Showing posts with label Painting. Show all posts

Monday, 11 May 2020

Painted Garden Rocks

Today my daughter and I painted rocks for her garden as markers for the various vegetables she is planning to grow.  We chose several rocks from our back yard, made ourselves some tea, then set ourselves up with paints and brushes and scrolled through Pinterest looking for inspiration.  There were so many ideas (isn't there always on Pinterest?) that it was difficult at first to decide.


garden rocks in various shapes and sizes (wash and dry the rocks)


Finally we decided to paint all the rocks black as a base coat for a consistent look
We used acrylic paint
and tried to find rock shapes that suited our subject matter

Here is our final harvest of garden rocks.  
This was a really lovely way to spend a dull and chilly afternoon together.  It was a fun and easy activity that let us be creative with what we had on hand, without a big time commitment and only a few paint brushes to clean up afterwards.  Within a couple of hours we had everything completed and her garden will look pretty all summer long. 

Thank you for stopping by My Turquoise Kettle Life today.

Wishing each of you a beautiful day,

Sandra


Friday, 8 July 2016

How to Whitewash a Table Top

I am the owner of what was once a roadside-abandoned kitchen table.  The legs are painted a gorgeous rich red but when it was rescued the table top had a hand-painted plaid motif down the centre.  I lived with it as such until my mom said "You should really do something with that table, paint it or something...."

It was true, I had become so accustomed to its ugliness, I no longer noticed it.  So over a year ago, when I was on a very high dosage of the prescription drug Prednisone, (I mention this because Prednisone can create in one a sense of... let's just say...."unabashed enthusiasm") I awoke very early one morning (very little sleep being another side-effect of the medication), grabbed some paint from the studio and repainted my kitchen table with large bold flower-like swirls.
table extension sanded and painted table top 


I still believe the flowers were an improvement over the plaid and I happily lived with it until the past few months when I began to hide it under various tablecloths.  So last week I dismantled the table, hauled it into the driveway and began the process of stripping, scraping and sanding (thank you Dad for the loan of the belt sander!!).
Stinky, messy, toxic stripper. This wasn't working for me.


Out came the big guns, my dad's belt sander!

Getting there, very slowly

Finally beautiful bare wood.


With the top down to bare wood (I'll spare you the details of how long that took), I decided to whitewash the top. I used a mixture of two acrylic paint colours: unbleached titanium and white. Mixing 2 parts paint and one part water I brushed on the paint using long strokes going with the grain of the wood, then with a slightly damp cloth I wiped off the excess paint to even it out and reveal the wood grain.

Unbleached Titanium Acrylic Paint

The extension whitewashed

Final result 
With the top completely whitewashed and dried I very lightly sanded over the entire top (220 grit sandpaper), moving in the direction of the grain. A quick wipe with a cloth and I was ready to put on the varnish: two coats of matte and a final coat which I mixed half matte, half satin finish varnish. Be sure to give each coat time to dry and sand lightly before the next layer.  I'm delighted with the result and won't be hiding it under a tablecloth any time soon!

Thank you for stopping in at My Turquoise Kettle Life today.

Paint yourself the perfect day!

Sandra


Thursday, 7 July 2016

Under the Influence

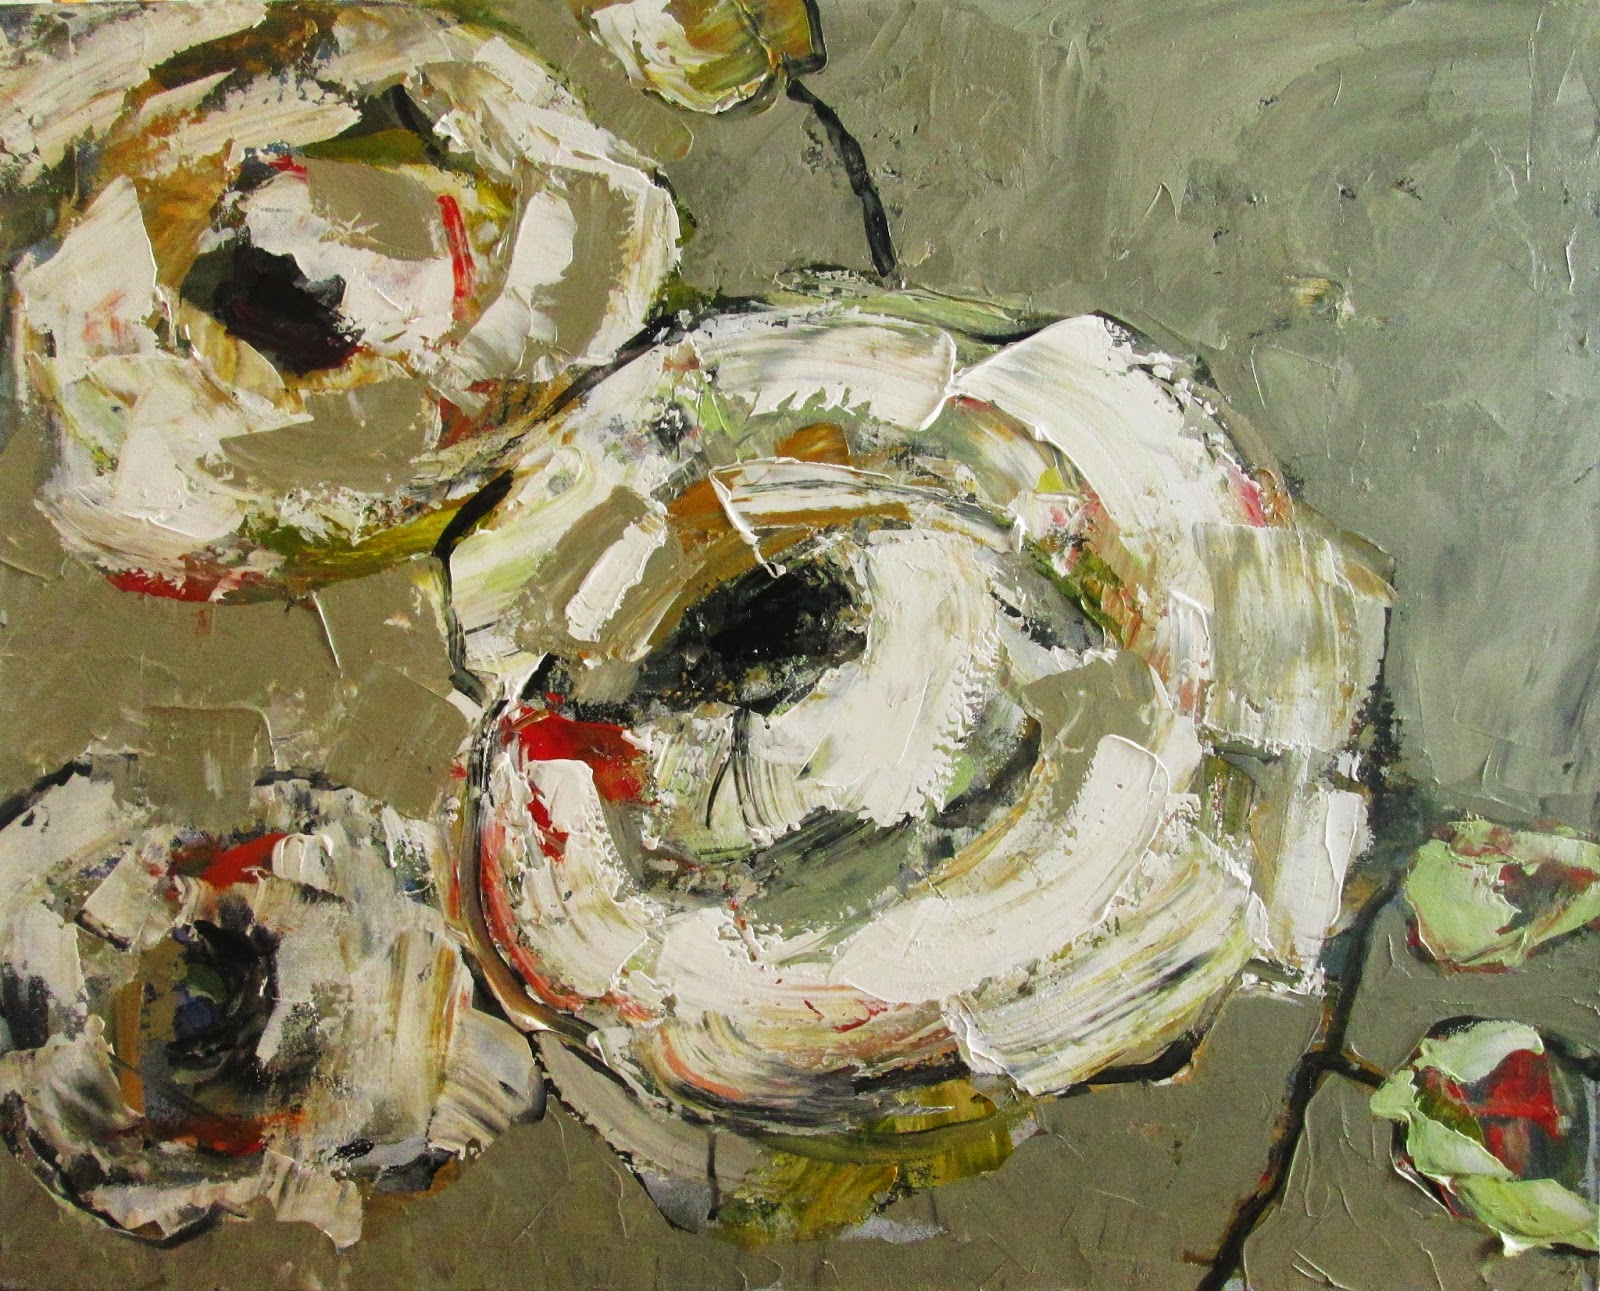
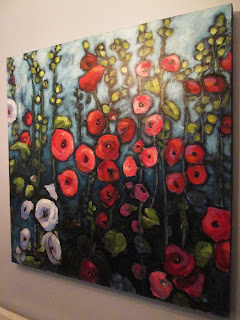
Hollyhocks - (Sandra)
Recently my five year old granddaughter has been painting with me in the studio.  We've talked about landscapes, portraits and still life. She is a free-spirit and has her own ideas about most things including creativity and painting so it was interesting when we tackled a still life and her work was very reminiscent of my own style.  Not surprising; we imitate and learn.  We are influenced.

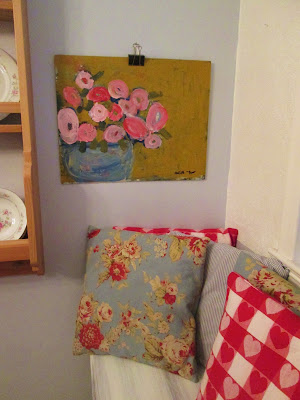
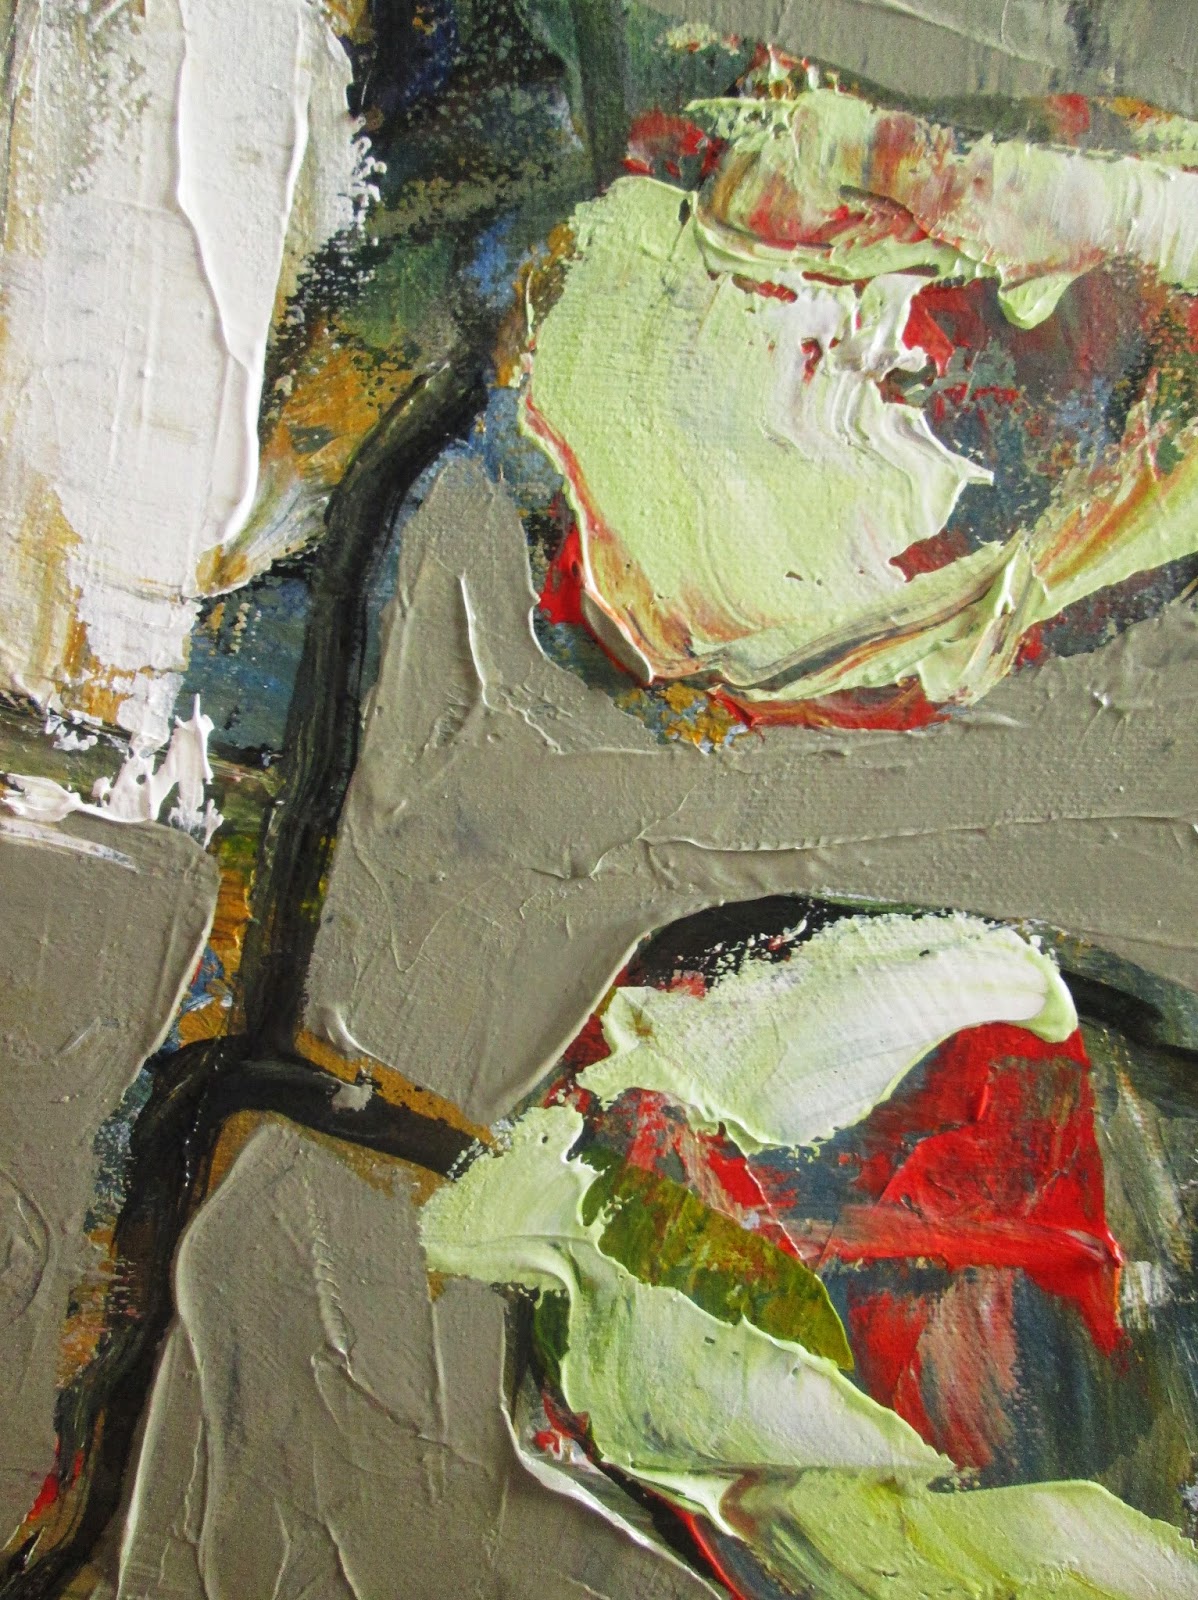
Pink flowers in a blue bowl  (SJ)


I wondered if "influe" originated with the idea of in-flow and yes that is the origin of the word ( late Middle English: from Old French or Latin, "inflow".  Originally suggesting "influx, flowing matter".) If you adhere to the belief that all life is vibrating energy flowing and moving, you can picture how influence may work, other people's ideas, beliefs, behaviours and energy flow to us and through us.

So when Jim Rohn famously said that "You are the average of the five people you spend the most time with.", I can see how that may be true or at least how the general idea of that may be true.  We are sponges soaking in our environment, what we see, what we hear, what we consume (both physically and emotionally).  With awareness we can always choose to reject and release any negativity that we have encountered, but how much simpler and healthier to deliberately choose, when we can, to surround ourselves with what we do want to absorb, what we do want in-flowing and influencing us.

Since I'm highly sensitive, I'm particular about what I eat, read, watch and how I care for myself.  I try to surround myself with beauty and to choose people who are uplifting and positive.  Does it mean that we don't reach out to those who are depressed, ill, hurting?  Not at all, we are meant to give and receive help, comfort and connection; it is important though to strike a balance and perhaps to off-set a particularly negative, draining encounter with a rejuvenating one.  Sometimes however, a long on-going, no-end-in-sight situation calls for extremely difficult decisions; ending the relationship, changing jobs, moving and moving-on.

We are all "under the influence" of our environments and relationships.  What or whom is influencing you? What could be tweaked to fine tune your already wonderful, happy life?  Or conversely, if life isn't flowing as you would like it to, is it time to make those difficult choices and  "flush" a negative influence down the proverbial drain?  

Thank you for visiting My Turquoise Kettle Life today.

Wishing you a most positive day,

Sandra


Thursday, 29 January 2015

Back at the Easel

This week my painting friends and I braved the cold and wind to gather at our shared studio and create.  I arrived uninspired and feeling rusty.  I brought an old painting, predominately blue in colour and turned it upside down to begin again.  I wondered where my brush would go and what my heart had to say (if anything).  As my painting began to take shape my studio mate chuckled, "Encore les circles?" (Still circles?)  What can I say?  Circles that bloom into more flowers.

Garden Party - 24" x 30"

Detail of Garden Party
Thank you for visiting My Turquoise Kettle Life.
Wishing you a very happy day,
Sandra

Thursday, 8 May 2014

Painting Flowers


Pot with Flowers.  10" x 12"  Acrylic, Graphite and Collage.


I did this painting several weeks ago and took it along to a small format show.  It never got a second look that day and I nearly painted over it several times since.  My good friend and fellow artist, Joan, saw it and loved it.  Suddenly I thought it had merit again.  Why didn't I trust my own instincts?  Why did I need outside approval?  

I have some work that I am so deeply connected to I don't care what anyone says about it; I know its good because I love it.  Some others I think are fine, but fall more deeply in love with as time goes by.  And then there are paintings I unearth in my studio and wonder how I possibly signed my name to them... ghastly.  Maybe paintings are like relationships: some are love at first sight and remain so, others grow on us over time and still others that were once lovely could now be recycled.

Thank you for stopping in at My Turquoise Kettle Life.

Wishing you a day of quiet joy,

Sandra


Wednesday, 23 April 2014

Painting Flowers

Sometimes I get "stuck" on a painting theme.  Right now it seems to be flowers.  I may tell myself I'd like to do a landscape or a figurative painting, but the only thing that wants to be expressed is flowers.

Title: Four Vases
30" x 30" Acrylic and Mixed Media on Gallery Canvas

I chose to repaint over a former abstract work that I wasn't in love with.

What it looked like "Before"
"After"

 You can see that the new painting was "sketched" directly over the old one.  This is a fun challenge because you have to work with what is already there.  (The colours in the before photo, taken a few years ago with a different camera, are more vibrant but the second is more accurate in terms of colour intensity. ) 

I wanted to keep the painting loose and not overly "worked".

Detail from Four Vases


I used blue tissue paper to add areas of interest and a watercolour pencil to outline some of the flowers.

Detail from Four Vases

Diluting acrylic paint with a little medium creates some transparency, which reinforces the unfinished, loose, undefined feeling.  A brush helps to create outlines but using a spatula prevents the painting from being overly controlled.

I hope you can find something creative to put your hand to this week.

Thank you for visiting My Turquoise Kettle Life today.

Wishing you a beautiful day,

Sandra


Tuesday, 11 March 2014

Out of Hibernation

It's nearly mid-March.  How long have I been hibernating for?  Months in fact.  Months and months of pulling inward away from the world, away from the darkness, the cold and life's winter storms.  Weather patterns can be so unpredictable.  So when life's storms arrive on your door step I hope that you have your survival kit in order.  Mine contains: kindred spirits, a quiet corner, prayer (if you can manage it, and on the worst days you may not be able to), a dog to curl up with and mugs of tea.

With the arrival of March the sun is stronger, the sound of melting snow trickles to the sewers and the smell of mud reminds me that it is time to come out and play again.  That is how I found myself back in my painting studio after months of inactivity.  I tried to paint intuitively choosing colours and shapes that pleased me without giving myself any restrictions.  My goal was to play, to be happy again.

Title: Happy Flowers
40" x 40" Acrylic Mixed Media on Canvas


Detail from Happy Flowers


Today is sunny and the mercury has climbed all the way to 5 degrees Celsius; and tomorrow?  Fifteen to twenty centimeters of snow.  Oh well, today is lovely and I have decided not to let tomorrow's flurries dampen my happiness today.  I'm on my way out the door for a sunny walk with our dog.

Thank you for stopping by at My Turquoise Kettle Life today.
Wishing you a most happy day,
Sandra


Wednesday, 24 April 2013

Mamita Restaurant - Exhibits my Paintings


A dozen or so of my most recent paintings are currently hanging in Saint Lambert's newest restaurant, Mamita.   Owner and chef, Carole Kingsbury has created a delightful yet simple restaurant offering a wide variety of homecooked meals.  The decor is relaxed and  "zen" - the perfect setting for my most recent collection of abstract and semi-abstract works. 

Located at 2001 Victoria Avenue, Saint Lambert (corner Simard) and open for breakfast and lunch daily, dinner Thursdays through Saturdays. 


A piano enhances the mood during evening meals, guests are welcomed to play as well.


Hope to see you there!
 
Thank you for stopping visiting My Turquoise Kettle Life today,
 
Wishing you a yummy day,
Sandra


Saturday, 16 February 2013

Animal Fostering - Eat, Play, Love Animal Rescue

Animal rescue is a rewarding but demanding mission.  Samantha and Emily, co-founders of the Eat, Play, Love Animal Rescue (rescue link) know this first hand.  The rescue exists due to their efforts and vision but equally because of the foster families who house, love and care for the rescued dogs and cats until they are permanently adopted.

These foster "moms and dads" are the unsung heroes of animal rescue.  While Samantha and Emily are the public face of Eat, Play, Love; visible during pet fairs, adoption days and on facebook, the foster families are the behind the scenes heroes; heroes who are cuddling, feeding and yes, poop scooping day in and day out. 

That is why I was so excited to be asked to create a special thank-you gift for a foster "mom" who took three abandoned shepherd pups into her home.  Nathalie bottle fed the three day old puppies and has raised them over the past nine weeks.  Now the puppies are healthy, rambunctious and ready for adoption. 


Working from a photo, I painted Nathalie smooching with Noel, one of the little female pups.  It captures Nathalie's love and devotion to all of her little charges.  Hopefully it will remind her of how deeply her efforts have been appreciated.

We are surrounded by every day heroes.  Why not take an opportunity to say, "I appreciate you." to a hero in your midst.

Thank you for stopping in at My Turquoise Kettle Life today.

Wishing you a beautiful day,

Sandra


Monday, 28 January 2013

Hand Painted Table Runner No. 2


A few months ago I published a post on how to make a hand painted table runner.  That first table runner had a floral design and today, I just want to very quickly show you another that I have completed that is a whimsical version using birds and chicks as the design theme.

Hand Painted Table Runner
S. King-Allikas


Hand Painted Table Runner
S. King-Allikas
 
What I thought was fun was to use bits of collage to represent the birds' wings.  I used a palette knife to paint most of the background and then a brush to outline the birds.  Placing the birds in different directions avoids the design from having a one way orientation only.
 
You could make a few of these and tuck them away for gift giving.  Just remember that to store these table runners you will need to roll them up, not fold them.
 
Thanks for visiting My Turquoise Kettle Life today,
 
Wishing you a fun and whimsical day,
 
Sandra


Thursday, 24 January 2013

Painting of a Teacup

My previous posts this month have been about creating a warm cozy home environment in which to nestle for these frigid winter months.  With all of that sorting, purging and beautifying done my focus has wandered back to the easel.

I've just finished a 36" x 36" painting of a teacup.  The use of a simple subject allowed me to employ texture, collage and to play around with the background without the painting becoming too busy or fussy.  Setting the cup off kilter lends an unexpected and playful element to an otherwise very traditional still life subject.

Painting of a Teacup
36" x 36" Mixed Media
Sandra King-Allikas
The inside of the cup is covered in collage (A special thank you to Stella for amply supplying me with collage material!).   

Detail - Painting of a Teacup
Bird motif and its reflection
Sandra King-Allikas

During the painting process I noticed a motif of a bird had quite accidentally appeared on the upper right hand side sitting on the saucer (you may have to use your imagination), then I noticed a small dark reflection of the bird on the saucer just below it.  That's weird, I thought.  Later, as I was working on the collaged area at the upper left,  I notice another bird motif (see the light coloured square and how the space between the collage creates a geometric shaped bird facing left?).  It's interesting how our subconscious works.  My painting mentor didn't hesitate when I pointed them out to her...."Freedom", she said, "Birds represent the concept of freedom and what your subconscious is dealing with will float (or should I say fly?) to the surface of your paintings."

Detail - Painting of a Teacup
Bird motif in collage
Sandra King-Allikas


Freedom.  I have been pondering the concept of freedom; the word appears on the pages of my journal, in my prayers and in my conversations.  I am realizing more and more that I have so much freedom, much more than I ever believed; it was only the constraints of old belief systems, the expectations of others and self-imposed limits that ever clipped my wings.  What a wonderful feeling, freedom... now that is my cup of tea!

Thank you for visiting My Turquoise Kettle Life today.

May you be truly free today,

Sandra


Tuesday, 8 January 2013

Make a Hand Painted Pillow

It's wintery and blustery and oh so chilly.  Here's an idea for making a beautiful hand painted pillow that will be comfy and add a pretty touch to a special cozy corner.


I created this painting pretty much as I would for any of my traditional paintings, so that it a truly original piece of art and signed by the artist. 

To create this project you will need.

Canvas type fabric
Acrylic paint
Paint brush or pallet knife
duct tape or masking tape
a pillow form or fibrefill for the stuffing
a sewing machine or needle and thread for hand sewing.

I think the process is probably obvious for most DIY-ers but here are some photos to guide you.

tape off area to be painted

Create your masterpiece
(don't worry the fabric will get wavy until it dries)

Let paint dry. Remove masking tape.
 
Sign your name

With right sides together, sew the back and front of the pillow
together, leaving an opening for your pillow form.
Turn, trim corners and insert the pillow form.
I made mine so that the cover could be removed for laundering.
Yes! they are washable on a delicate cycle, hang to dry.


  • If you want to make your pillow cover washable you will have to "set" the paint.  Once the paint is fully dry, place it on your ironing board.  Cover the painted area completely with an old tea towel or piece of cotton fabric.  Iron on a high setting for about 20 seconds.  Remove the tea towel and let cool.

Let your imagination run wild, or coordinate your colours to your decor.  With some supervision, even your children can create a pillow for their room or to give as a gift.

Thank you for stopping in at My Turquoise Kettle Life today.

Wishing you a pillowy-soft kinda day,

Sandra


Sunday, 16 December 2012

My New Website

2012 has been a very busy and creative year.  One of the exciting undertakings has been developing my own website.  This site showcases most of my recent paintings under the heading Gallery and from which you may select various categories; abstract, landscape and so on.

The site is also a good way to find out about upcoming exhibits, workshops etc. under the heading Events.

To visit my website just click the link below.  You can also find your way there by clicking Gallery near the top of this blog page.  I hope that you enjoy your visit.


Wednesday, 12 December 2012

How to make a painted table runner or placemats

If you are looking for a creative and unique gift idea or just a way to beautify your table, here is a guide to a creating a gorgeous table runner or placemats.

Here are two photos of the finished product to inspire you.


Materials

canvas by the meter (or yard) from an art supply store preprimed on one side.
1/2 " wide double stick carpet tape
measuring tape
right angle
scissors
pencil
acrylic paint
acrylic varnish satin finish (found at art supply stores)


Using your measuring tape and right angle, mark out in pencil on the preprimed size of the canvas the dimensions of your table runner allowing and extra inch in over all length and width (to account for the hem). 
Cut along your outline.


Using a straight edge measure 1/2 inch around the inside of the cut edge (this will be your hem line)
At the corners mark diagonally as shown and cut along this line to create a mitered corner.


Fold the canvas in toward the unprimed side and run your finger along to create a crease.


Place the double stick tape along the edge of each side.


Remove the backing of the tape and fold in the edge so that it is well stuck down.
Repeat on all four sides


Your table runner is now ready to paint as you wish.
Remember that it will be viewed from all four sides so avoid a design that has an obvious one way orientation (such as a landscape)

Once your design is finished, let it d;y completely.
Apply two coats of varnish allowing time to fully dry in between applications (about 3 hours).
Voila! Your project is complete!


Avoid folding your completed table runner; instead, to store it, roll it around an empty paper towel roll.

That's it.  If you have questions send me an e-mail at sandra.myturquoisekettlelife@gmail.com

Thank you for visiting My Turquoise Kettle Life today.

May your day be perfect,

Sandra